Mini Paper Chain Wall Art
Level of difficulty: Beginner
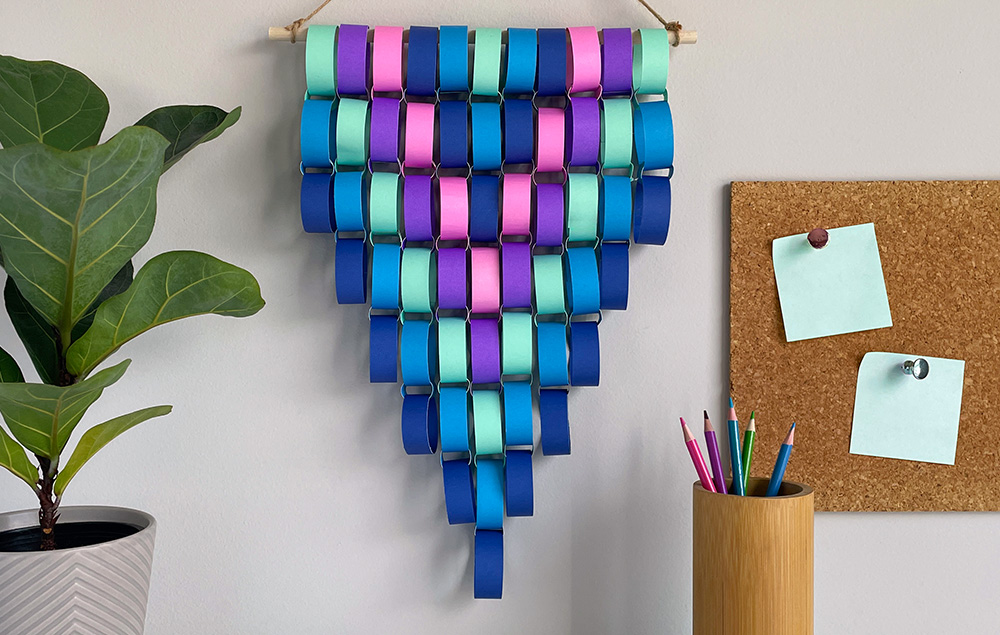

Create a mini paper chain wall hanging using just a few supplies. With the included pattern template, this easy DIY project transforms simple materials into a stylish and personalized home decoration!
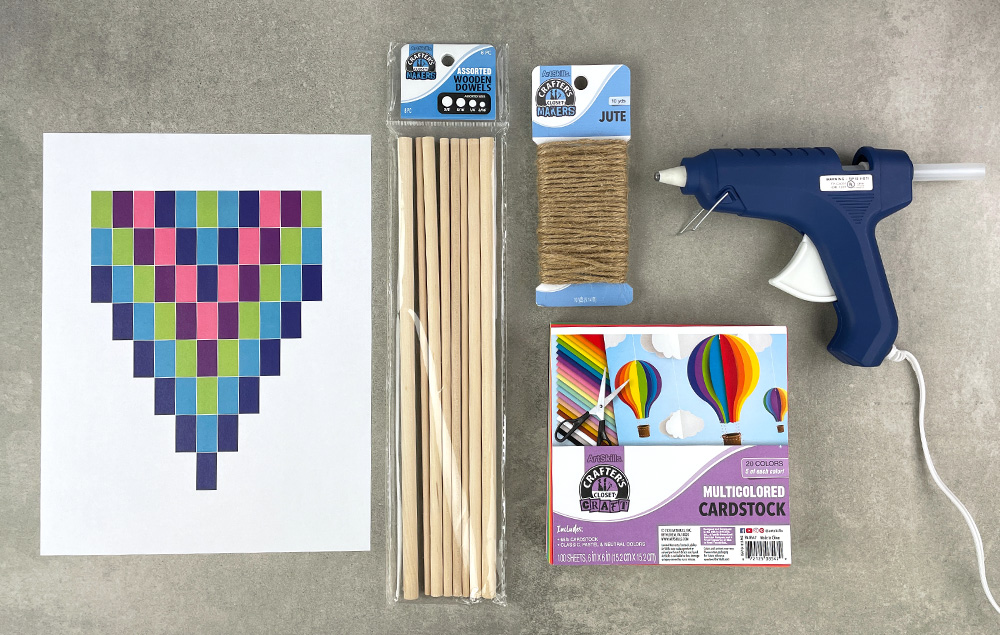
What You'll Need:
Let's Do This!

Step 1:
A) Print out the template to use as a guide for color placement.
Step 2:
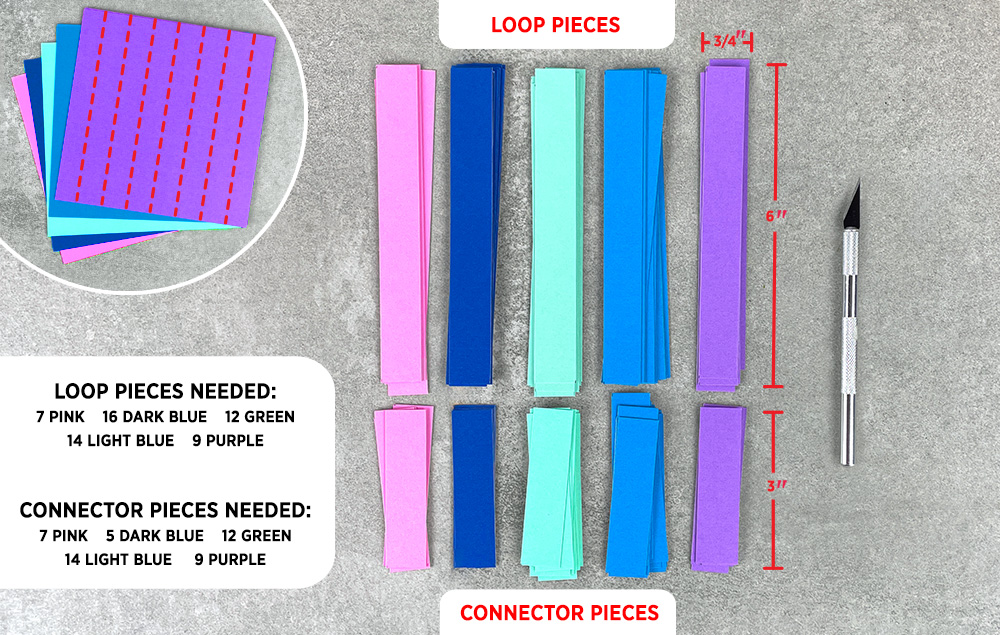
A)Cut cardstock into the strips needed to make the pattern. Tip: Be very precise when cutting the strips so that the finished piece is neat and properly aligned.
a) You will need 3/4" x 6" loop pieces in the following colors and amounts:
i) 7 Pink, 9 Purple, 12 Green, 14 Light Blue, 16 Dark Blue
b) You will need 3/4" x 3" connector pieces in the following colors and amounts:
i) 7 Pink, 9 Purple, 12 Green, 14 Light Blue, 5 Dark Blue
Step 3:
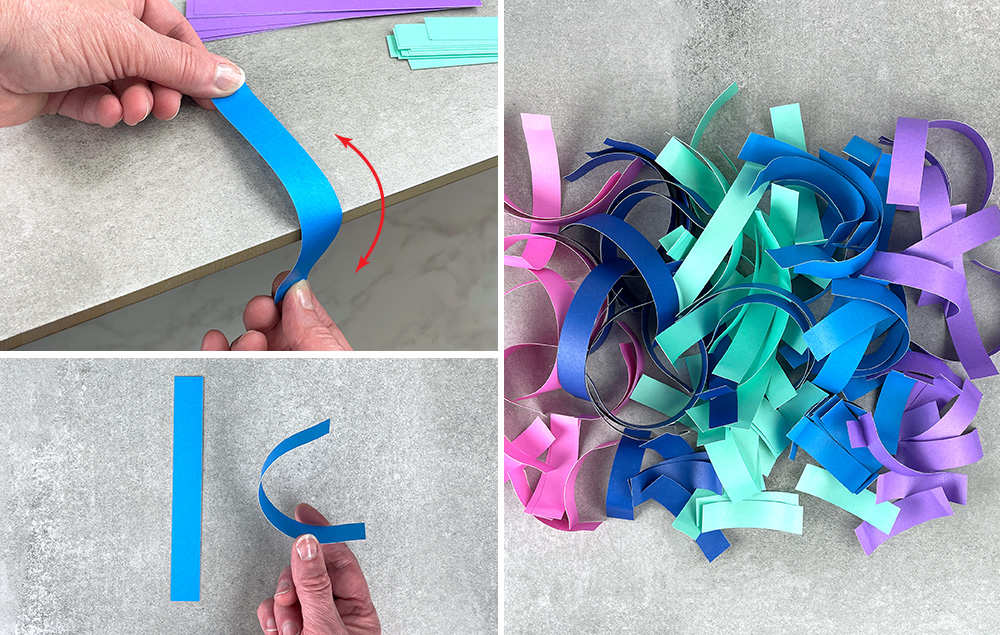
A) Use the edge of a table to pull each strip of paper back and forth.
B) This will add a smooth curve to the paper strips.
C) Use this technique on all of the loop pieces and connector pieces.
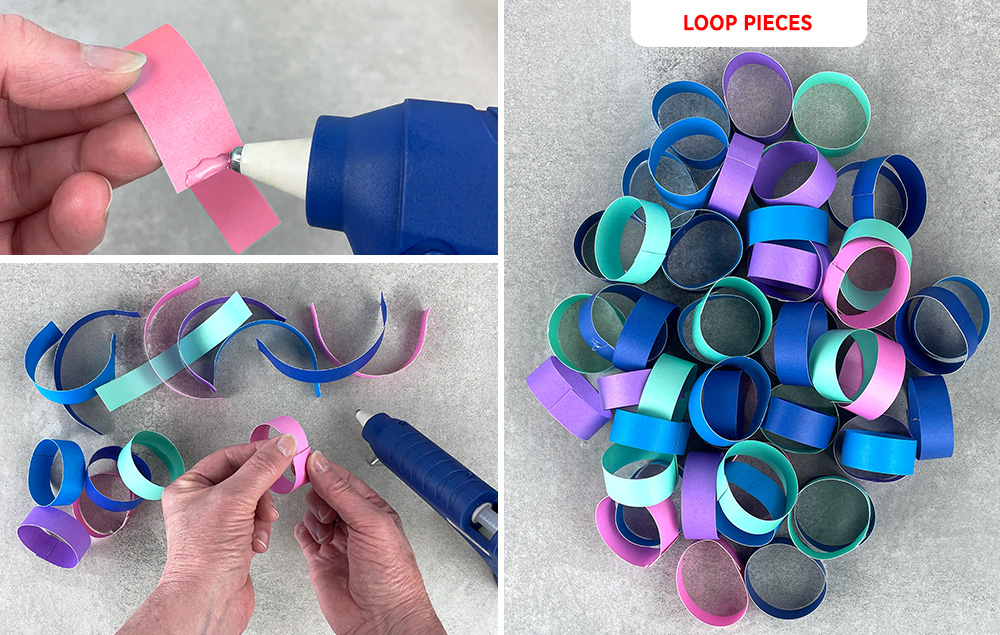
Step 4:
A) Hot glue all the 3/4" x 6" loops so they are completed and ready to use. Tip: Keep the seam overlap the same when gluing so the finished loops are uniform in size.
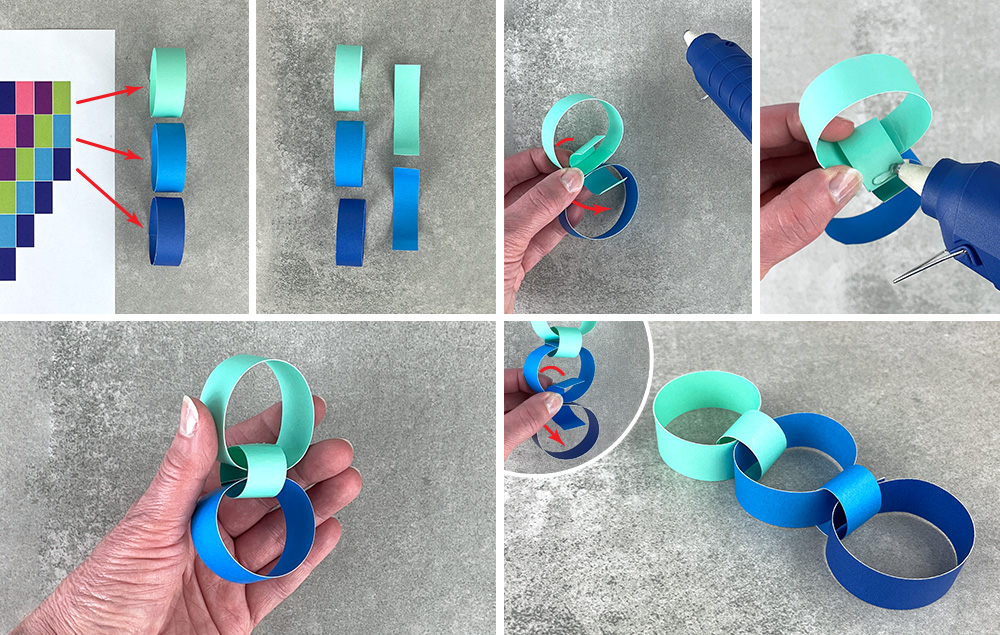
Step 5:
A) Follow the color pattern on the template to gather the loops needed to make the first strand. Note: Connector pieces should be the color of the top loop.
B) Insert a connector piece between the first two loops. Add hot glue to the connector piece and press the ends together.
C) This will make a smaller loop and connect the main loops. Repeat the process to connect the remaining loop on the first strand.
D) The first strand is now complete!
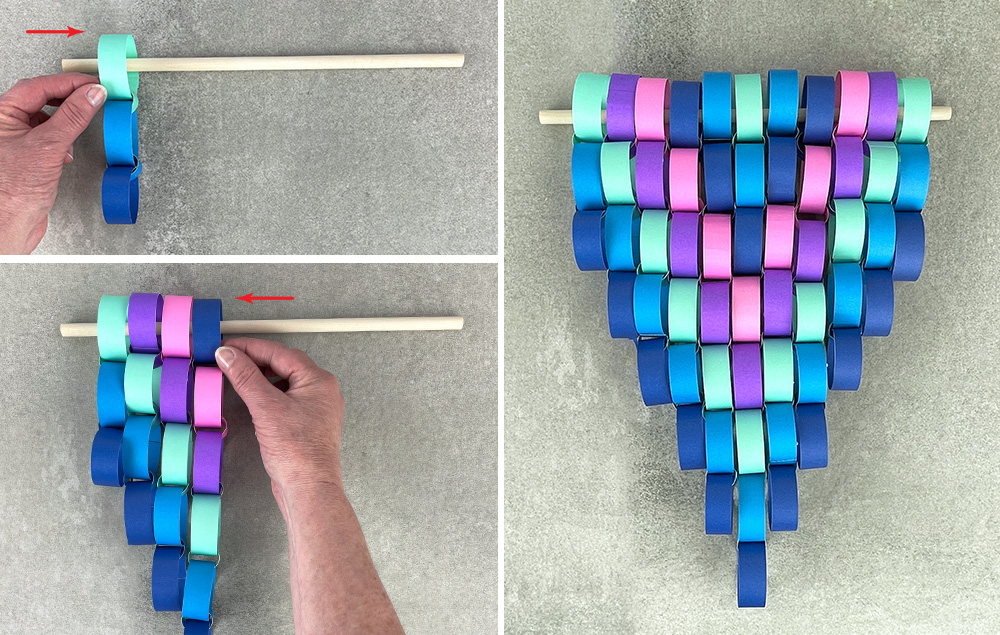
Step 6:
A) Slide the first strand onto a wood dowel.
B) Continue making strands and sliding them onto the wood dowel, using the template as a guide for color placement.
C) Finish making all the strands and adding them to the wood dowel.
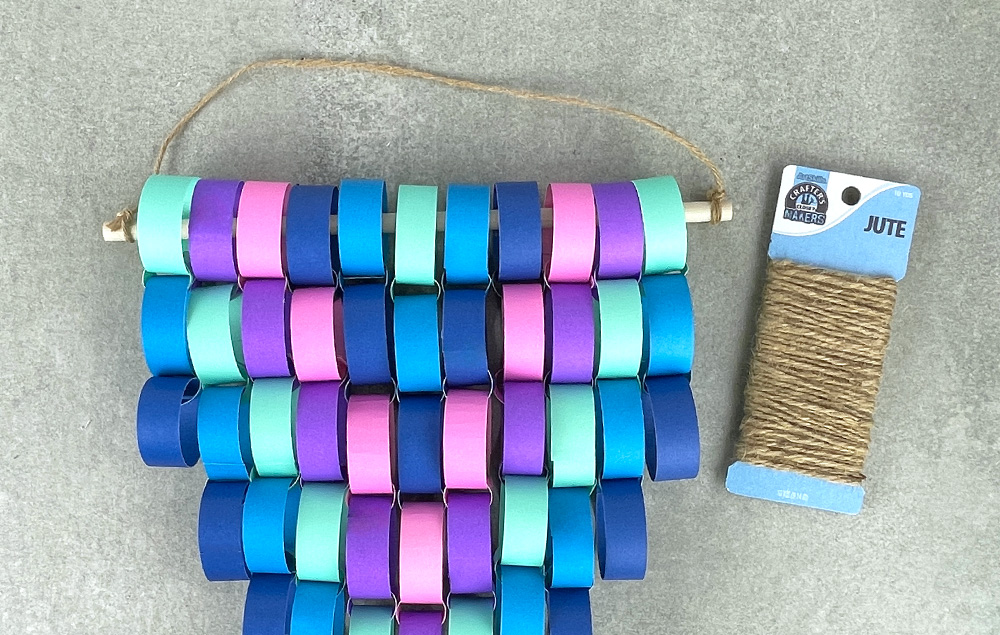
Step 7:
A) Add a piece of jute to the ends of the wood dowel to act as a hanger.
Mini Paper Chain Wall Art
- Filename
- Template_Mini_Paper_Chain_Wall_Art.pdf
- Size
- 56 KB
- Format
- application/pdf


